Customizing the Kanzi Studio interface
You can customize the Kanzi Studio interface. You can open new, rearrange, dock, and close windows to make the environment that best suits your needs.
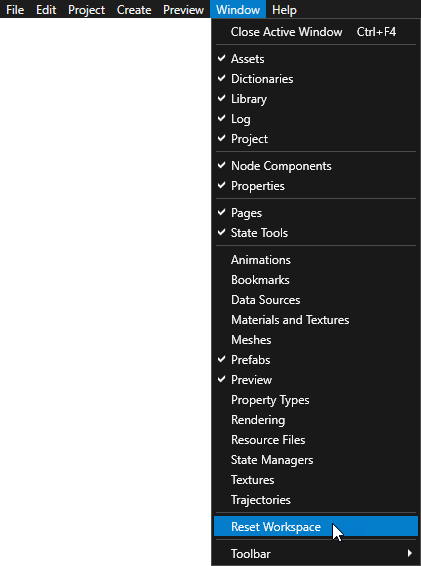
To restore the workspace to the default state, in the main menu select > Reset Workspace.

Opening windows
To open a new window select and select the window you want to open:
- Animations shows animation data, animation clips, timeline sequences, and timeline entries in your project. See Animations.
- Assets show the 2D and 3D content, materials, and prefabs in your project.
- Bookmarks shows the shortcuts in your project. See Using bookmarks.
- Rendering shows render passes and filters in your project. See Rendering and Filters.
- Data Sources shows the data sources in your project. See Data sources.
- Dictionaries shows the resource IDs of the resources that are local to the node you select in the Project. See Resources.
- Library shows all the resources in your project. Here you can find, create, and edit all the materials, textures, animations, trajectories, composers, and other resources in your project. You can open a separate dockable window for each resource type. See Resources.
- Log shows the status of your project such as messages triggered in your project, but also warning and error messages. See .
- Materials and Textures shows brushes, materials, material types, shader formats, and textures in your project. See Using brushes, Material types and materials, Using binary shaders, and Textures.
- Meshes shows the mesh data in your project. See Using meshes.
- Node Components shows the components, such as triggers and animation players, for the node selected in the Project or Nodes. See Triggers and Animations.
- Nodes shows all items in the screen of your project. Here you can create new objects and organize the structure of your project.
- Pages shows the pages tool where you can create and manage the structure of your application. See Using the Page and Page Host nodes.
- Prefabs shows the prefabs in your project. See Using prefabs.
- Preview window shows your project the way it appears to your users. The Preview window can be either in Edit or Interact mode:
- In the Edit mode you can edit the content in your project. Select any of the Preview window tools to enter the Edit mode.
- In the Interact mode you can interact with your application in the Preview window as you would on a device. When you are using a Preview tool, to switch to the Interact mode, in the Preview window click
 .
.
- Project shows the structure of your projects. This is where you create and organize the content, and manage your projects. See Projects.
- Properties shows the properties for the item you select in either Project, Nodes, or Library. When you add, remove, or edit the properties, you edit the look and behavior of the selected item.
- Property Types shows the custom property types in your project. See Property types.
- Resource Files shows the resource files in your project grouped by file type. See Resource files.
- State Managers shows the state managers in your project. See State manager.
- State Tools shows the tools you can use to create, set, and manage states in your application. See State manager.
- Textures shows the textures in your project. See Textures.
- Trajectories shows the trajectories in your project. See Trajectories.
Rearranging windows in your workspace
You can rearrange your workspace by docking, undocking, opening and closing windows.
To undock click the header of the window and drag it either to a new location in the guide diamond, or drop it to keep the window floating.
To close a window, click the X in the header of the window you want to close.
To dock a window:
- Click the header of the window you want to dock.
A guide diamond appears in the center of the area where the window is.

- Drag the window over the area where you want to dock it, and move it over the corresponding portion of the guide diamond.
The area where the window docks becomes shaded.

- Release the mouse button to dock the window in the indicated position.

Adding any window as a tab to another window
You can add any window as a tab to any other window to see more than one type of content in the same window.
To add any window as a tab to another window:
- Click and drag the header of the window over the window where you want to add it as a tab, and move it over the central part of the guide diamond.

- Release the mouse button to add the window as a tab.

Using offline documentation
When you are connected to the Internet, and in Kanzi Studio press F1 or select > Documentation, Kanzi Studio points your default web browser to the Kanzi documentation website.
To sign in to the Kanzi Support Portal and to use the Kanzi online documentation, in your browser you must allow these cookies:
- support.rightware.com
- zendesk.com
- rightware.zendesk.com
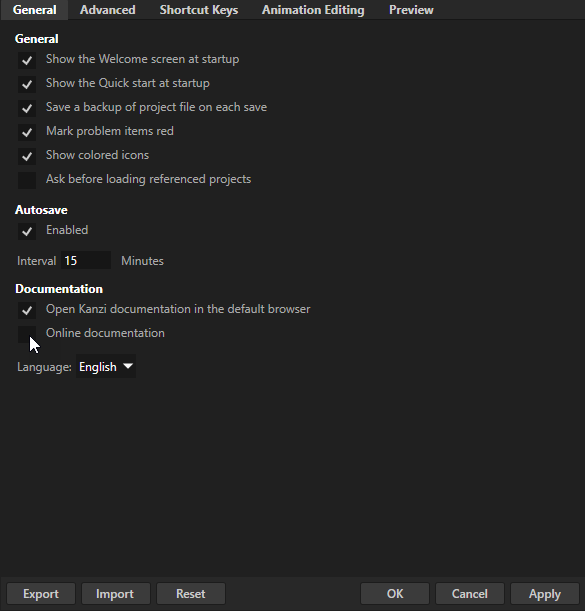
To view the Kanzi documentation when you are not connected to the Internet, in Kanzi Studio select > User Preferences and disable the Online documentation setting. When disabled Kanzi Studio uses the documentation installed in the <KanziWorkspace>/Documentation directory.

NOTE
The documentation installed with Kanzi in the <KanziWorkspace>/Documentation directory is released with your installation of Kanzi, while we update the documentation available at docs.kanzi.com between Kanzi releases.
See also
Tutorial: Getting started with Kanzi Studio
What is installed with Kanzi?

Open topic with navigation


 .
.


